What Are the Shutterstock Contributor Requirements for 2026?
If you’re looking for the Shutterstock contributor requirements for 2026, you’re in the right place. This guide covers everything you need to know, from the minimum age of 18 and photo standards through to exactly how to get your account approved and start earning.
Originally set up in 2002 by programmer and photographer Jon Oringer, and it remains one of the most popular stock libraries available today. As a result, it’s one of the easiest ways to earn a full-time or passive income stream from your photography.
Shutterstock Contributor Requirements for 2026 at a Glance
| ✅ | Minimum age: 18 years old |
| ✅ | Valid government ID required |
| ✅ | Minimum image resolution: 4MP |
| ✅ | Images must be in JPEG format |
| ✅ | No watermarks or logos |
| ✅ | Model releases required for recognisable people |
Please remember to review Shutterstock’s official website for the most up-to-date requirements, terms and conditions.
To submit content for sale, you must have a Shutterstock contributor account, separate from any existing account you may already have for downloading images. In addition, the requirements at the time of writing are:
Account: Set up an account with your full legal name as it appears on a valid tax form so you can receive royalties.
Content Ownership: You can only submit work for which you hold the copyright.
Included in this post is a bonus download -> Scroll down to the bottom to access it
Want to grow your photography business with less overwhelm and more direction?
Want to generate a passive income with your photography alongside your main business of photography?
🤍 Easy-to-action marketing tips, advice and strategies.
💙 Straight-talking advice from someone who’s been there.
Sign up below and start making progress in your business today. 👇🏻
Create a Shutterstock Contributor Account
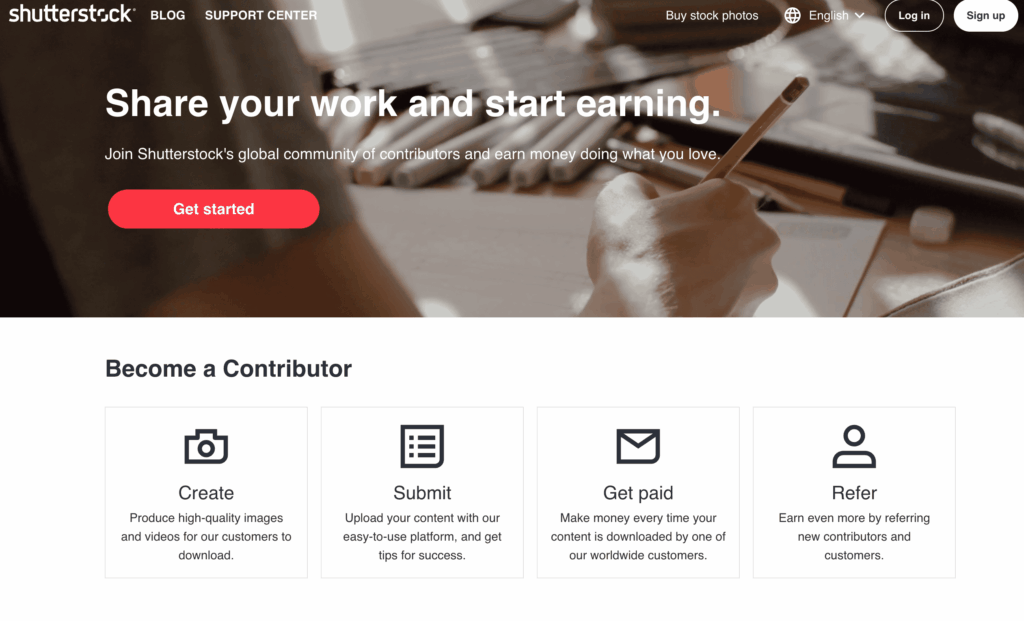
The Shutterstock contributor page offers a wealth of resources that I encourage you to explore, including the latest downloads, high-value in-demand content, and current trends. I would also suggest you check out and download the Shutterstock contributor app, which is available for both iOS and Android users.
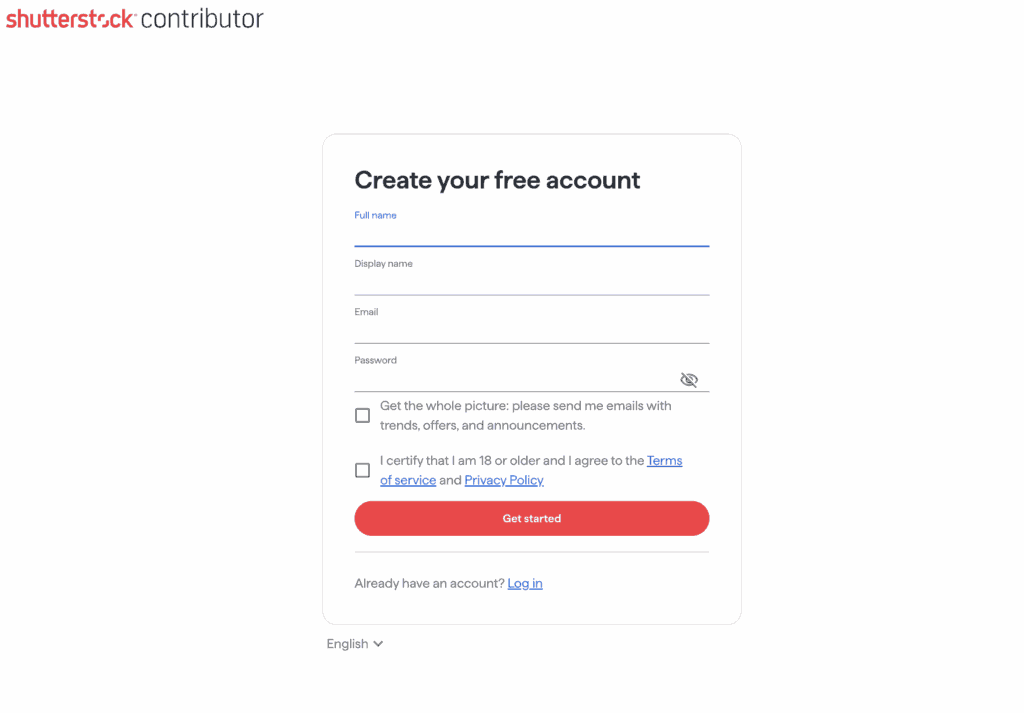
To get started, sign up with your email and personal details on the registration page. You’ll need to verify your email address, so be sure to check your junk and spam folders.
Finally, to complete the account setup process, you’ll need to upload a valid photo ID that includes your address; this could be a valid driving licence or ID card.
Photo and Video Requirements for Shutterstock Contributors
Before you upload your inital 8-10 images to your Shutterstock account for the submission process, there are some important things you need to be aware of to ensure your images are approved. If, however, an image is rejected, don’t get dispondent. They will always give you a rejection reason so you may re-upload after you’ve fixed the problem.
The most common reason for images to be rejected:
1. Focus: The Main subject is out of focus, or the entire image’s focus is too soft.
2. Exposure: either too bright or too dark
3. Noise/Artefacts
4. Missing or invalid model release form/property release.
5. Image contains trademarks, logos or other recognisable brand elements.
What File Formats and Technical Requirements Does Shutterstock Accept?
In terms of photos, the Shutterstock contributor requirements 2026 state that images must be JPEG; you cannot upload RAW files. Additionally, images must be at least 4 megapixels in size and no more than 50MB, and should preferably be sRGB colour profile.
Video requirements.
For video, files must be .mov or mp4, with a maximum file size of 4GB. In addition, the video clip must be between 5 and 60 seconds long. It can be either horizontal or vertical, and there shouldn’t be any audio unless it enhances the clip or is considered editorial content.
Illustrative (Vector) requirements.
For illustrative work, files should be EPS 10 or 8 with a total file size not exceeding 100MB. Furthermore, no locked layers or rasterised files are permitted, and the bounding box must be a minimum of 4 megapixels and up to 25 megapixels.
Finally, the requirements I’ve stated should be used as a guideline. I would encourage you to check out the most up-to-date requirements in full on Shutterstock, before submitting your inital files.
-
How do I Maintain my Etsy Shop
How do I maintain my Etsy shop? Your complete guide to running a successful Etsy store. Running a successful Etsy shop isn’t just about setting it up and waiting for sales to roll in. If you’ve ever asked yourself, How do I maintain my Etsy shop once the initial excitement wears off, you’re not alone…
How to Become a Shutterstock Contributor and Prepare Your Initial Submission.
Before anything else, decide how you plan to license your photos or videos- either for commercial use or editorial use. If you plan to sell with a commercial license, ensure you have the appropriate releases in place: a model release for recognisable people and a property release for any recognisable private property. You’ll also need to ensure there are no visible trademarks or logos in the image.
Submitting Editorial Images as a Shutterstock Contributor
If you’re submitting images for editorial licence, on the other hand, you must ensure the image is as true to life as it was when it was taken. For instance, you shouldn’t delete objects or people from the scene, and if it was raining on the day you shot the image, you can’t swap out the sky for a blue sunny one. Editorial images don’t require releases, even if people or properties are recognisable, as long as they’re used for fair reporting or are in the public interest. However, editorial images cannot be used for promotional purposes; instead, you are sharing the image in a non-commercial, informative way.
Shutterstock Contributor Metadata: Titles, Keywords and Categories.
Whilst this isn’t the most exciting part of submitting to Shutterstock, it is fundamentally the second most important part, so it’s well worth taking your time to do it right.
To start with, your title should be clear, descriptive and between 6 and 12 words. Here are a couple of good and bad titles:
Bad:
‘Woman working on a laptop’
‘Bathroom with essentials on a shelf’
Good:‘
Young woman working remotely on a laptop at a kitchen table with copy space.’
‘Sustainable bathroom essentials on a wooden shelf, natural light, with copy space.’
As you can see, the good titles are far more descriptive and give potential buyers a much clearer picture of what they’re getting. For editorial submissions specifically, you must adhere to the following format:
‘City, State/Country – Month Day Year: Description’.
Keywords
Shutterstock contributor requirements 2026: At the time of writing, Shutterstock allows you up to 50 keywords per image. which is one of the most powerful tools you have for getting your work found. Whilst you don’t have to use all 50, I always aim for a minimum of 28-30. By consistently hitting that number, you give your best photos the best chance of being discovered by a wide audience of potential customers.
Shutterstock will offer keyword suggestions based on your image, and whilst many may be suitable, not all of them will be relevant, so don’t automatically add them all. Instead, use your own judgement and be selective.
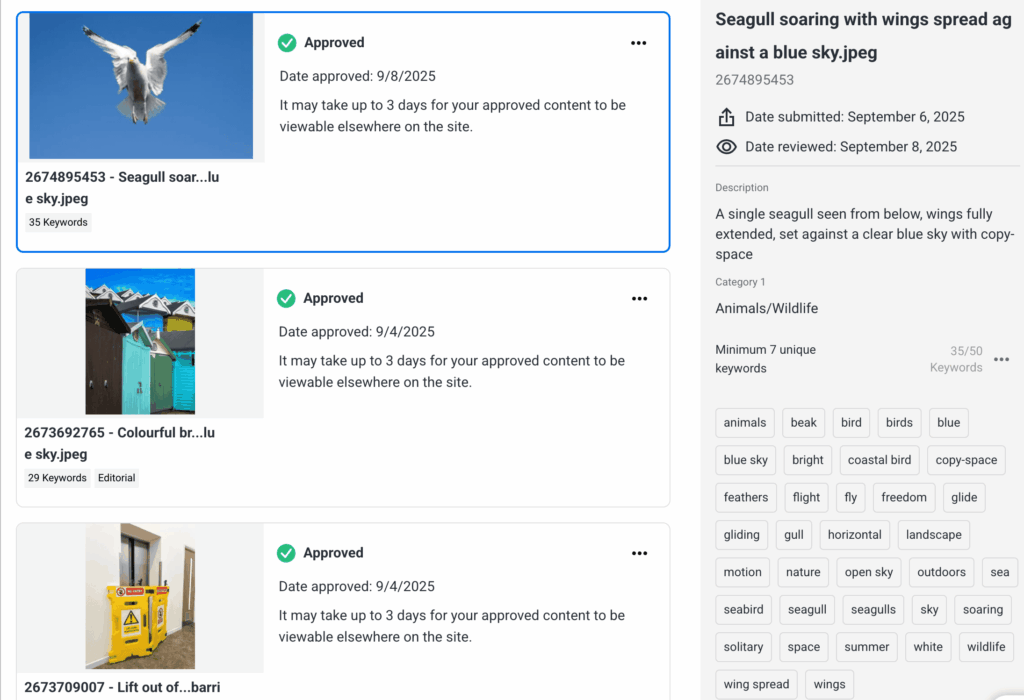
As a starting point, begin with the obvious descriptive words, then build outward with more evocative ones. For example, words like gliding, soaring, and freedom are verbs and adjectives that potential buyers may use when searching for the perfect image.
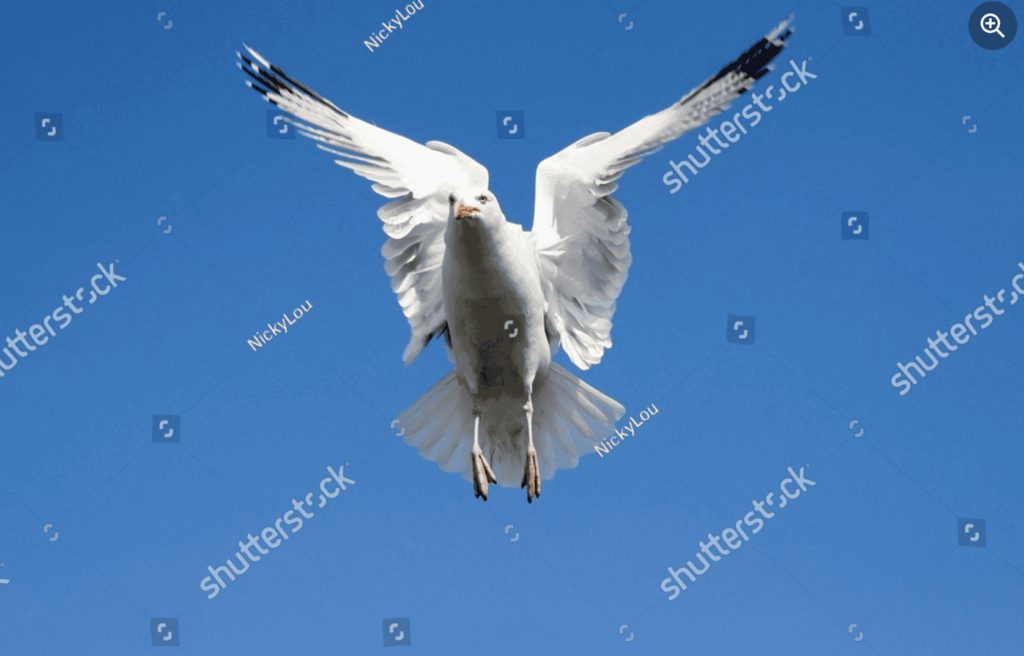
Below you can see the Shutterstock contributor dashboard showing photo submissions approved with description, keywords, and categories.
Categories
Shutterstock allows you to submit in up to 2 categories, and I have images listed in both. However, I’m careful not to randomly add an image to a category just because it’s available – if it’s not genuinely applicable, it won’t improve our chances of a sale.
In terms of options, Shutterstock categories include nature, technology, health and wellness, and business and finance, with one of the top-selling categories being food and drink.
Once you’re happy with your keywords and categories, go ahead and click submit. Congratulations, you’ve made your inital submission!
Bear in mind that wait times for Shutterstock’s quality controls teams to review your high-quality images will vary, so be patient.
What’s Next for Your Shutterstock Contributor Account?
It’s tempting to sit and wait until you hear if your images have been accepted or not, but my advice is to be proactive in the meantime.
Use the time to research images that Shutterstock are having active searches for, and start planning those images for your next submission.
In terms of outcomes, if your images are accepted, well done – that’s a great result. However, if any of your images are rejected, don’t despair. They will inform you why your image/s have been rejected, so you have a clear path forward. If you can, work on the image to correct the issue and resubmit. If you’re unable to, don’t worry and don’t take it personally. Instead, learn from it and move on to your next set of images.
Ultimately, Rejection isn’t failure, it’s simply the way we learn and improve.
How Much Can Shutterstock Contributors Earn?
Simply put, the more quality stock photos and video clips you have with Shutterstock, the higher percentage you’ll earn. It’s also worth knowing that the earnings levels are reset each calendar year, beginning on 1st January.
Below is a breakdown of expected earnings for both video and photos, correct at the time of writing this blog in autumn 2025, though I’d encourage you to check out their earnings structure here
Shutterstock Contributor Earnings: Photo Breakdown
|
Image Levels |
Number of Image Licences This Calendar Year |
You Earn |
|---|---|---|
|
Level 1 |
Up to 100 |
15% |
|
Level 2 |
101-250 |
20% |
|
Level 3 |
251-500 |
25% |
|
Level 4 |
501-2,500 |
30% |
|
Level 5 |
2,501-25,000 |
25% |
|
Level 6 |
Over 25,000 |
40% |
Earnings breakdowns for video content.
|
Video Levels |
Number of Video Licences This Calendar Year |
You Earn |
|---|---|---|
|
Level 1 |
Up to 10 |
15% |
|
Level 2 |
11-50 |
20% |
|
Level 3 |
51-250 |
25% |
|
Level 4 |
251-5,000 |
30% |
|
Level 5 |
5001-25,000 |
35% |
|
Level 6 |
Over 25,000 |
40% |
At first glance, you may think that the percentages are low and that the annual reset on 1st January means you’ll never earn any significant commission. On the surface, that may seem true. However, as I explain to photographers, submitting images and videos to Shutterstock should always be done with a clear strategy and done consistently.
To illustrate what that can look like in practice, here are some earning example scenarios as a Shutterstock contributor.
Let me show you some earning example scenarios as a Shutterstock Contributor.
|
Contributor Level |
Est Monthly Earnings |
Images Submitted Weekly |
How That May Play Out |
|---|---|---|---|
|
Level 3 |
$150-$300 |
10-15 |
You shoot 2-3 strong images per day. Over a month, 40-60 images give you a steady small income, and you move from the starter levels |
|
Level 4 |
$300-$600 |
25-30 |
You plan a couple of shoots per week, use themes buyers demand, and upload regularly, 100-200 per month. |
|
Level 5 |
$600-$1,200 |
60-70 |
Submit 50 images per week (=2,600/year). If your work is well-performing, you might average 3-10 downloads per image. Over time, this could propel you to level 5. |
|
Level 6 |
$1,200 + |
100+ images |
You’re working at full rhythm, multiple shoots per week, varying themes, high efficiency in editing, keywording, etc., 400+ images per month. |
As you can see, the numbers vary significantly depending on your output and consistency. Ultimately, these assumptions depend on you getting steady sales per image – some images will sell poorly, while others perform much better. The figures are illustrative only, but if you’re serious about earning money through stock photography, a solid strategy and consistent uploads of high-quality, in-demand images will deliver results over time.
Tips for Meeting Shutterstock Contributor Requirements
- Create digital content that sells. When you plan and shoot, think like a buyer. Rather than taking just one image in multiple ways: a tight crop for details and texture, a mid crop for context, and a wide crop for copy space. In addition, shoot the same subject from 3 different angles, and 3 variations of each – that’s 9 individual images from a single subject.
- Don’t edit with trending filters. Whilst this is perfectly fine for your social platforms, it’s a definite no-no with stock images. Instead, ensure your white balance and exposure are correct and pay attention to keeping your horizons straight.
- Use the Shutterstock contributor app. Not only is it super convenient for accessing your contributor account on the go, but it also allows you to submit images on the go, review submissions and easily track your earnings all in one place.
- Don’t overlook mobile photography. You can also submit images taken on a mobile device, as long as all the technical details are correct. For example, I’ve successfully sold images that I’ve taken on my iPhone when walking the dogs, cooking and even strolling through my local high street.
- Organise all your submissions into categories. This not only helps potential buyers who like your style to find your other photos and videos, but it also ensures your profile is set up professionally for success.
Frequently Asked Questions
You must be at least 18 years old to become a Shutterstock contributor. You will also need to provide a valid government-issued photo ID to verify your identity when setting up your account.
Photos submitted to Shutterstock must be in JPEG format. RAW files are not accepted. Images must also be at least 4 megapixels in size and no larger than 50MB.
Earnings depend on how many licences you sell each calendar year. Percentages range from 15% at Level 1 up to 40% at Level 6. Levels reset on 1st January each year, so consistent uploading of high-quality, in-demand images is key to increasing your earnings.
Yes, if you are submitting images for a commercial licence and recognisable people appear in them, you will need a signed model release. Similarly, recognisable private property requires a property release. Editorial images do not require releases.
Shutterstock allows up to 50 keywords per image. Aiming for a minimum of 28–30 gives your images the best chance of being found by potential buyers.
Ready to Start Your Shutterstock Contributor Journey?
I hope you’ve found real value in this guide to the Shutterstock contributor requirements 2026. Ultimately, becoming a Shutterstock contributor is not about instant success. Rather, it’s about building a consistent workflow, learning what buyers need, and developing a portfolio that grows in value over time. The more you upload, refine your style, and understand your niche, the stronger your results will be. So, start small, stay consistent, and remember – every image you add is another opportunity for your work to be discovered and sold.
Want some help staying on track? Download my free month-by-month stock photography planner and start planning your shoots with purpose. It’s a simple way to stay consistent and build a portfolio that sells.
BONUS PDF – 16-PAGE PDF PLANNER TO TAKE YOUR STOCK PHOTOGRAPHY FROM MEH TO 💰.
If you’ve found this blog useful, why not check out my other blogs on becoming a successful stock photographer or building a fine art photography shop on Etsy?
Nicky x
Updated June 2026
